| Building sequence:
You can break down the building sequence into five
major steps :
1.) Dimension of bag section and finger.
2.) Cut and mark the fabric for final glue joints
3.) Glue the finger to the bag sections and bag sections to each
other
4.) Apply to craft and adjust bounce web.
5.) Set your craft on temporary feet, start lift and mark ground
contact line on finger, cut in shape and enjoy flying.
Sequence 1.)
Before you can get your bag and finger cross section you
have to determine your actual hover height which should be about 10% of
your craft width.
Once you know your hover height the bag section should provide 10 - 20
% and the finger section the remaining 80 - 90% of your final hover
height.
Hold in mind that your bag section has to provide a section which
is parallel to the surface to attach your finger.
Once you have the shape you can either make a temporary mock up
to get the dimensions or follow bag skirt and finger skirt pages for
the dimensions.
Bag section molds
Sequence 2.)
Take the dimension (length ) from the lower skirt
attachment line and top skirt attachment line of your craft.
Mark and cut the fabric as well as mark the final glue joints. Start
with the side sections of the craft , and mark the bag skirt section
first, remaining fabric can be used for finger. On the outer surface of
the bag skirt panel mark the location of your finger - it is useful to
start from the CL of the bag and work yourself to the aft and front
corner. Leave the last 1 ? ? ( or 50 cm ) open for the final corner
finger - which can be easiest done if your bag skirt panels (
side and front / aft ) are temporary glued together. Mark the corner
glue joints and don't forget to allow at least ?? ( or 1.2 cm )
for overlap and glue joint.
Turn the bag skirt fabric around and mark location of the bounce
web.
Once you have all lines on the fabric, make a template of a single
finger and mark to the left over material. Satisfied with the layout
start cutting all the finger and bag skirt sections.
Sequence 3.)
Lay the bag skirt sections (sides of craft) on a flat
surface and make sure that there are no wrinkles in the fabric. Glue
every second finger ( reference point A ) to your bag skirt section.
Allow enough time for the glue to set before bending them over and glue
one side section ( reference point B ) to the bag section. Do not
attempt to glue both at the same time since this would loosen the wet
glue joint. After the glue has adequate set apply the last finger
section ( reference C) to your bag section.
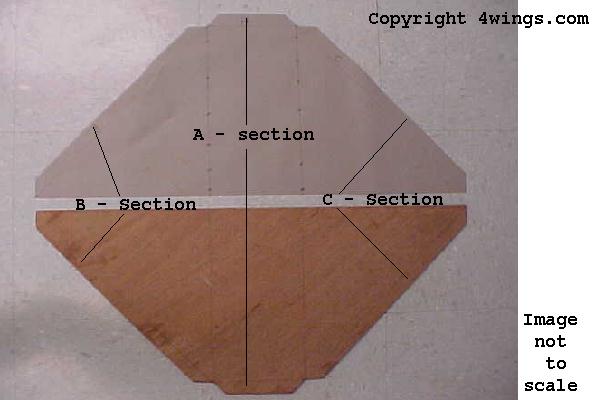
Top= Finger / X-X-X- Line = folding line
top = a, left = B , right = C
Bottom template for finger
Once you are done with the first set apply the remaining finger (
every second one) on glue joint (reference A) to the bag section. Allow
at least 24 hours for your glue to set before applying the side
sections of these finger in the same building sequence as described
above for the first set.
Before gluing the finger to the front and aft sections of your
skirt verify your CoG on the craft and be sure that the fingers ground
contact line will have an equal distance ( CoG to front ground
contact line as well as CoG to aft ground contact line.) to the CoG.
Only if this is the case start gluing the finger in the same sequence
as on the side panels of the skirt.
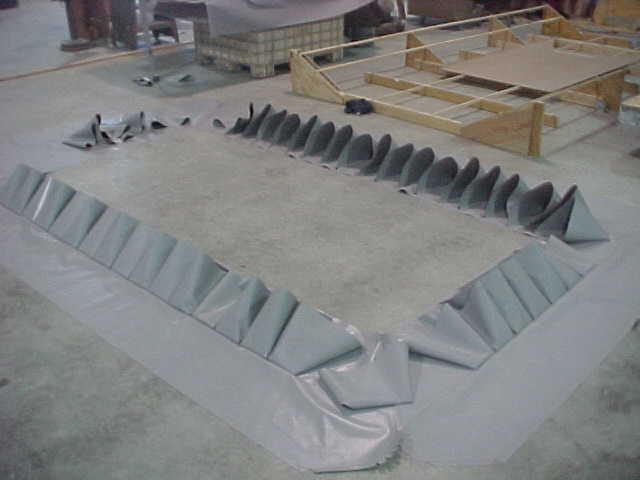
side front and aft finger attached -
ready for corner layout
Once all finger are attached to your bag skirt section decide on
a nice and clean layout for the corner finger. This is best done when
you glue the corners of the bag skirt along the lower corner together
while the fabric is still laying flat on a surface. Even if it is
very time consuming to apply the corner finger - if you rush now you
will increase friction of the craft.
Once you have all finger in place you can turn your skirt around and it
should stand on all the finger 45 degree pointing upwards. Apply the
bounce web to the inner side of the skirt and if you are 100% confident
that the dimensions are correct - glue as well to the top craft
attachment line (not recommended).
Now is the best time to glue all corner joints on your bag
section.
More or less done deal.
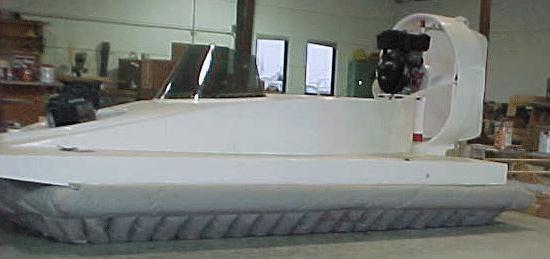
Sequence 4.)
Once your skirt is all glued and well dried - you can
start to attach it to your craft - start with the aft lower craft
attachment line and work yourself forward. Once the skirt is attached
to the lower hull set your craft on a leveled surface.
Now the bag and finger skirt should lay quite flat to the floor
and it is the best possibility to attach the bounce web ( temporary
with SS staples ) before you fold the bag section over and attach to
the top hull attachment line. When the skirt is all sealed it's time to
start your lift unit and apply pressure to the skirt - the bag section
should inflate while the finger should slowly expand and hold the air
under your craft. Most of them will be tucked under the craft and show
wrinkles in the ground contact line. If you have no major wrinkles in
the bag section and the appearance is more or less smooth it's time to
get to the final adjustment of the finger.
Sequence 5.)
Final adjustment. Try to support your craft on a
leveled surface to actual hover height. The easiest way is to let the
lift unit lift your craft and slide precut temporary feet under the
craft. Once you have supported your craft even - reduce lift pressure
to just over idle. This should provide enough pressure to hold the bag
section inflated and apply a small amount of pressure to the
finger. Mark all finger along the ground contact line and shut
lift unit down. Once the pressure escaped from your skirt it is
relatively easy to cut your finger in shape. Just for safety reasons
leave at least ?? (1.2 cm ) from your marked ground contact line
to the actual cut.
 Once all finger are even the required air volume should be less and
friction between surface and finger nearly nothing. Start your lift
unit and your craft should fly gently off the temporary feet - ready
for your first test flight.
Once all finger are even the required air volume should be less and
friction between surface and finger nearly nothing. Start your lift
unit and your craft should fly gently off the temporary feet - ready
for your first test flight.
4wings Main page
- 4wings Yachtservice - Kite-sailer.com - Site-map
|